Progressive Dip Calculator
How Do I Use the AGA Progressive Dip Calculator?
If an item is too large for total immersion in the kettle, progressive dipping can sometimes be utilized to partially galvanize the article at an angle, flip the article around, and then reprocess the article on the remaining surface to achieve a fully coated article with a small overlap area between. In theory, this can nearly double the size of a articles that can be galvanized when designing in modules or sub-units to accommodate the kettle dimensions cannot be achieved.
The AGA Progressive Dip Calculator is a tool used to confirm whether an article of known dimensions can be progressive dip galvanized within a galvanizing kettle of known dimensions by modeling the article as a 3-dimensional box.
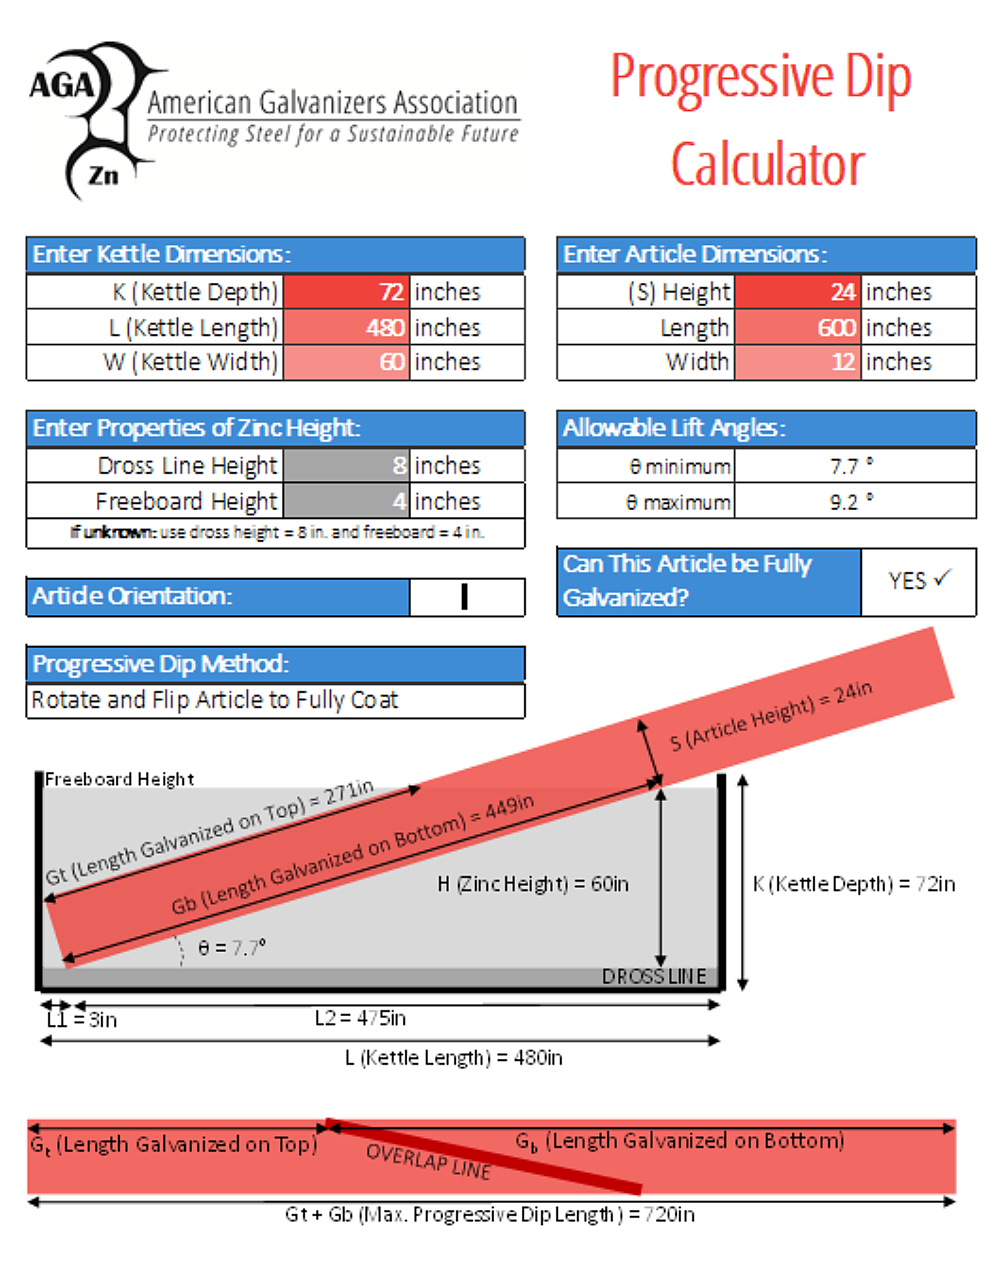
This calculator will not only inform you whether or not the article can be progressive dipped, but also provides key information necessary to make educated decisions about lifting arrangements and processing of the article which may influence the final decision to galvanize the article.
Furthermore, even if the article can be progressive dipped, the maximum height of articles above the bath, available rigging height, and maximum crane capacity varies widely by galvanizing plant and should be confirmed directly with the galvanizer ahead of time.
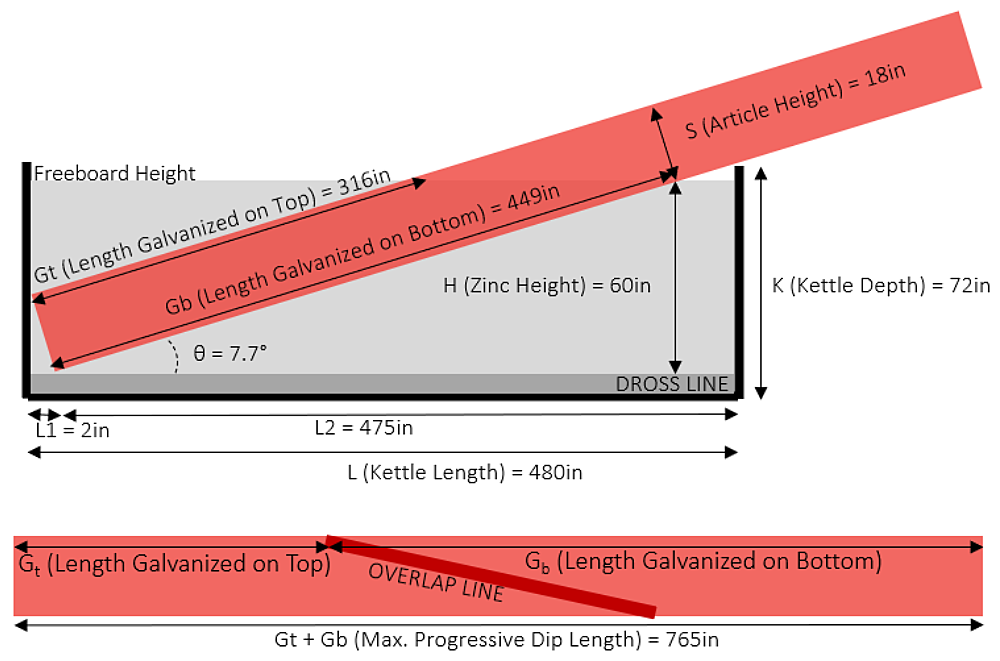
In order to begin using the calculator, the following inputs are required in order to perform the calculations developed by modeling the partially submerged item, as shown in Figure 2:
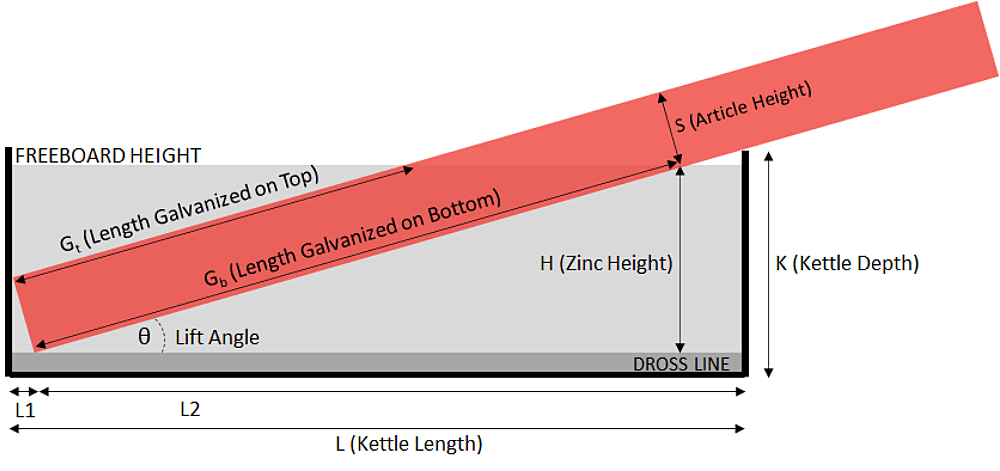
The inputs required to use the Progressive Dip Calculator are:
- Galvanizing Kettle Dimensions (Length x Width x Depth)
- Article Dimensions (Length x Width x Height)
- Estimated Galvanizing Dross Line Height
- Estimated Freeboard Height (i.e. gap between the height of the zinc and the top of kettle walls)
The dross line and freeboard heights are important variables in the calculation. The freeboard height affects the overall progressive dip length as the kettle is not filled to the very top with zinc, but typically a few inches below it. If the freeboard height is unknown, it is possible to estimate using 4 inches. The galvanizing dross line height will vary depending on the individual galvanizing kettle maintenance schedule, but articles are often lowered to a point above this line to minimize the potential for dross inclusions (dross pimples) on the surface of the article. For most articles, the presence of dross pimples which do not affect the performance of the galvanizing are acceptable, and a dross line value of 0 inches can be used when looking to maximize the article size which can be hot-dip galvanized. For the minority of articles where the presence of dross is not acceptable (i.e. handrails, architecturally exposed structural steel, articles to be painted or powder coated after HDG), input the dross height, or if unknown it is possible to estimate 8 inches for the dross line height (Figure 3.)

Based on these inputs, the calculator will provide you with various outputs for consideration:
Article Orientation
This box will provide you with a visual image of the article’s orientation cross-section within the galvanizing bath when looking at it from the end. This is also to assist you in visualizing how the article is modeled in the bath. Articles with height larger than the width dimension will be represented with a ▎symbol, articles wider than they are tall are represented with a ▬ symbol, and articles with the same width and height are represented with a ■ or square symbol (Figure 4.)

Allowable Lift Angles
This output provides the minimum and maximum lift or rigging angle that will allow for successful galvanizing. If the rigging angle is too low, the article will contact the top of the kettle in the wrong location, it will not immerse to the minimum required depth, and the article may not become fully galvanized. If the rigging angle is too high, not enough of the top of the part will be immersed in the first dip for successful galvanizing. If the range of allowable lift angles is very small to the point the lift angle must be within +/- 1 degree, the designer should evaluate whether suitable lift points are provided to allow for the range of angled lifts, and the galvanizer should evaluate whether they are capable of meeting the rigging tolerances with their available lifting equipment, the available lift points, and the plant layout (Figure 5.)

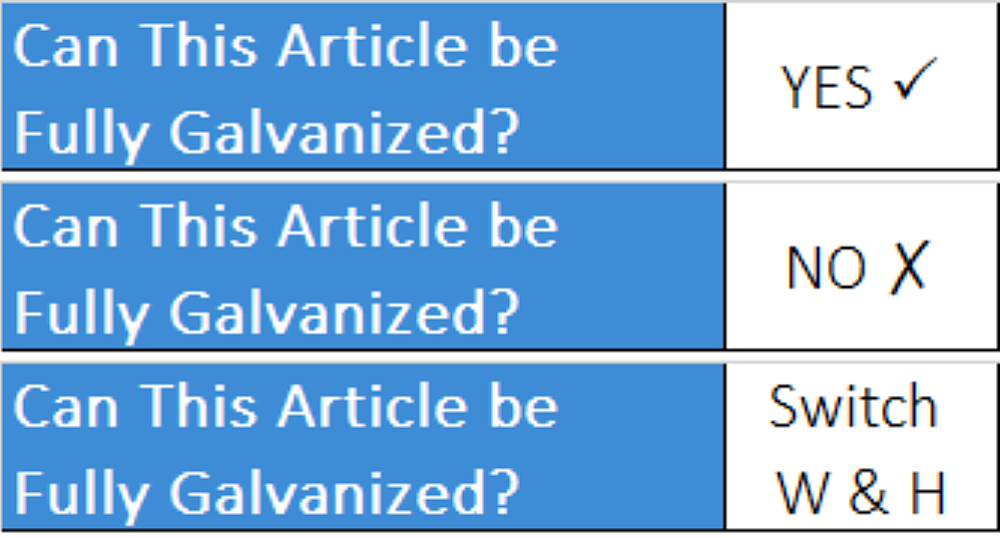
Can this article be progressive dipped?
This box will confirm whether the article can be galvanized fully, either by single dip or progressive dip methods. It also checks whether the article width will fit within the kettle width. For more details on the dip method to be used, refer to the Dip Method output box (Figure 6.)
Dip Method
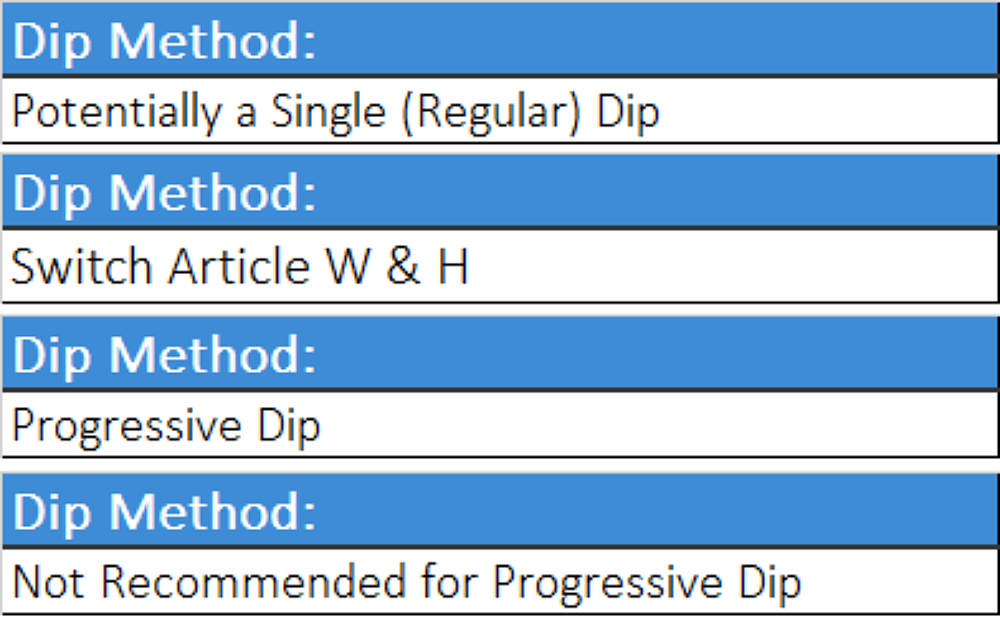
This box informs the user what type of dip methods are available for galvanizing the designated article. Most commonly, the calculator will confirm if the article can be successfully progressive dipped or whether the article is too large and progressive dipping is not recommended. In cases where the angled length of the article is less than the galvanizing kettle length, the calculator will tell you to consider a single dip (regular dip) process. If the article cannot be progressive dip galvanized as it is currently oriented but would be successful if you turned the article by 90 degrees on its side, an error message will tell you to switch the article width and article height. Depending on the venting and drainage details and available lifting points, turning the article on its side (i.e. swapping the article W and H dimensions in the calculator) may or may not be viable option for the galvanizer to pursue (Figure 7.)
Finally, the outputs are shown on the progressive dip model to further assist you in visualizing the progressive dipping process. Also included is a diagram which provides the maximum article length that can be galvanized with the inputs provided (Figure 8):
Example Calculation
To show you an example, let’s envision you wish to galvanize a beam (W33x221) that is 65' in length in a kettle 6 ft deep, 5 ft wide, and 50 ft long. When unknown, it is possible to estimate a freeboard height of 4 inches and a dross line height of 8 inches. After converting all dimensions to inches, you would provide the following inputs into the calculator:
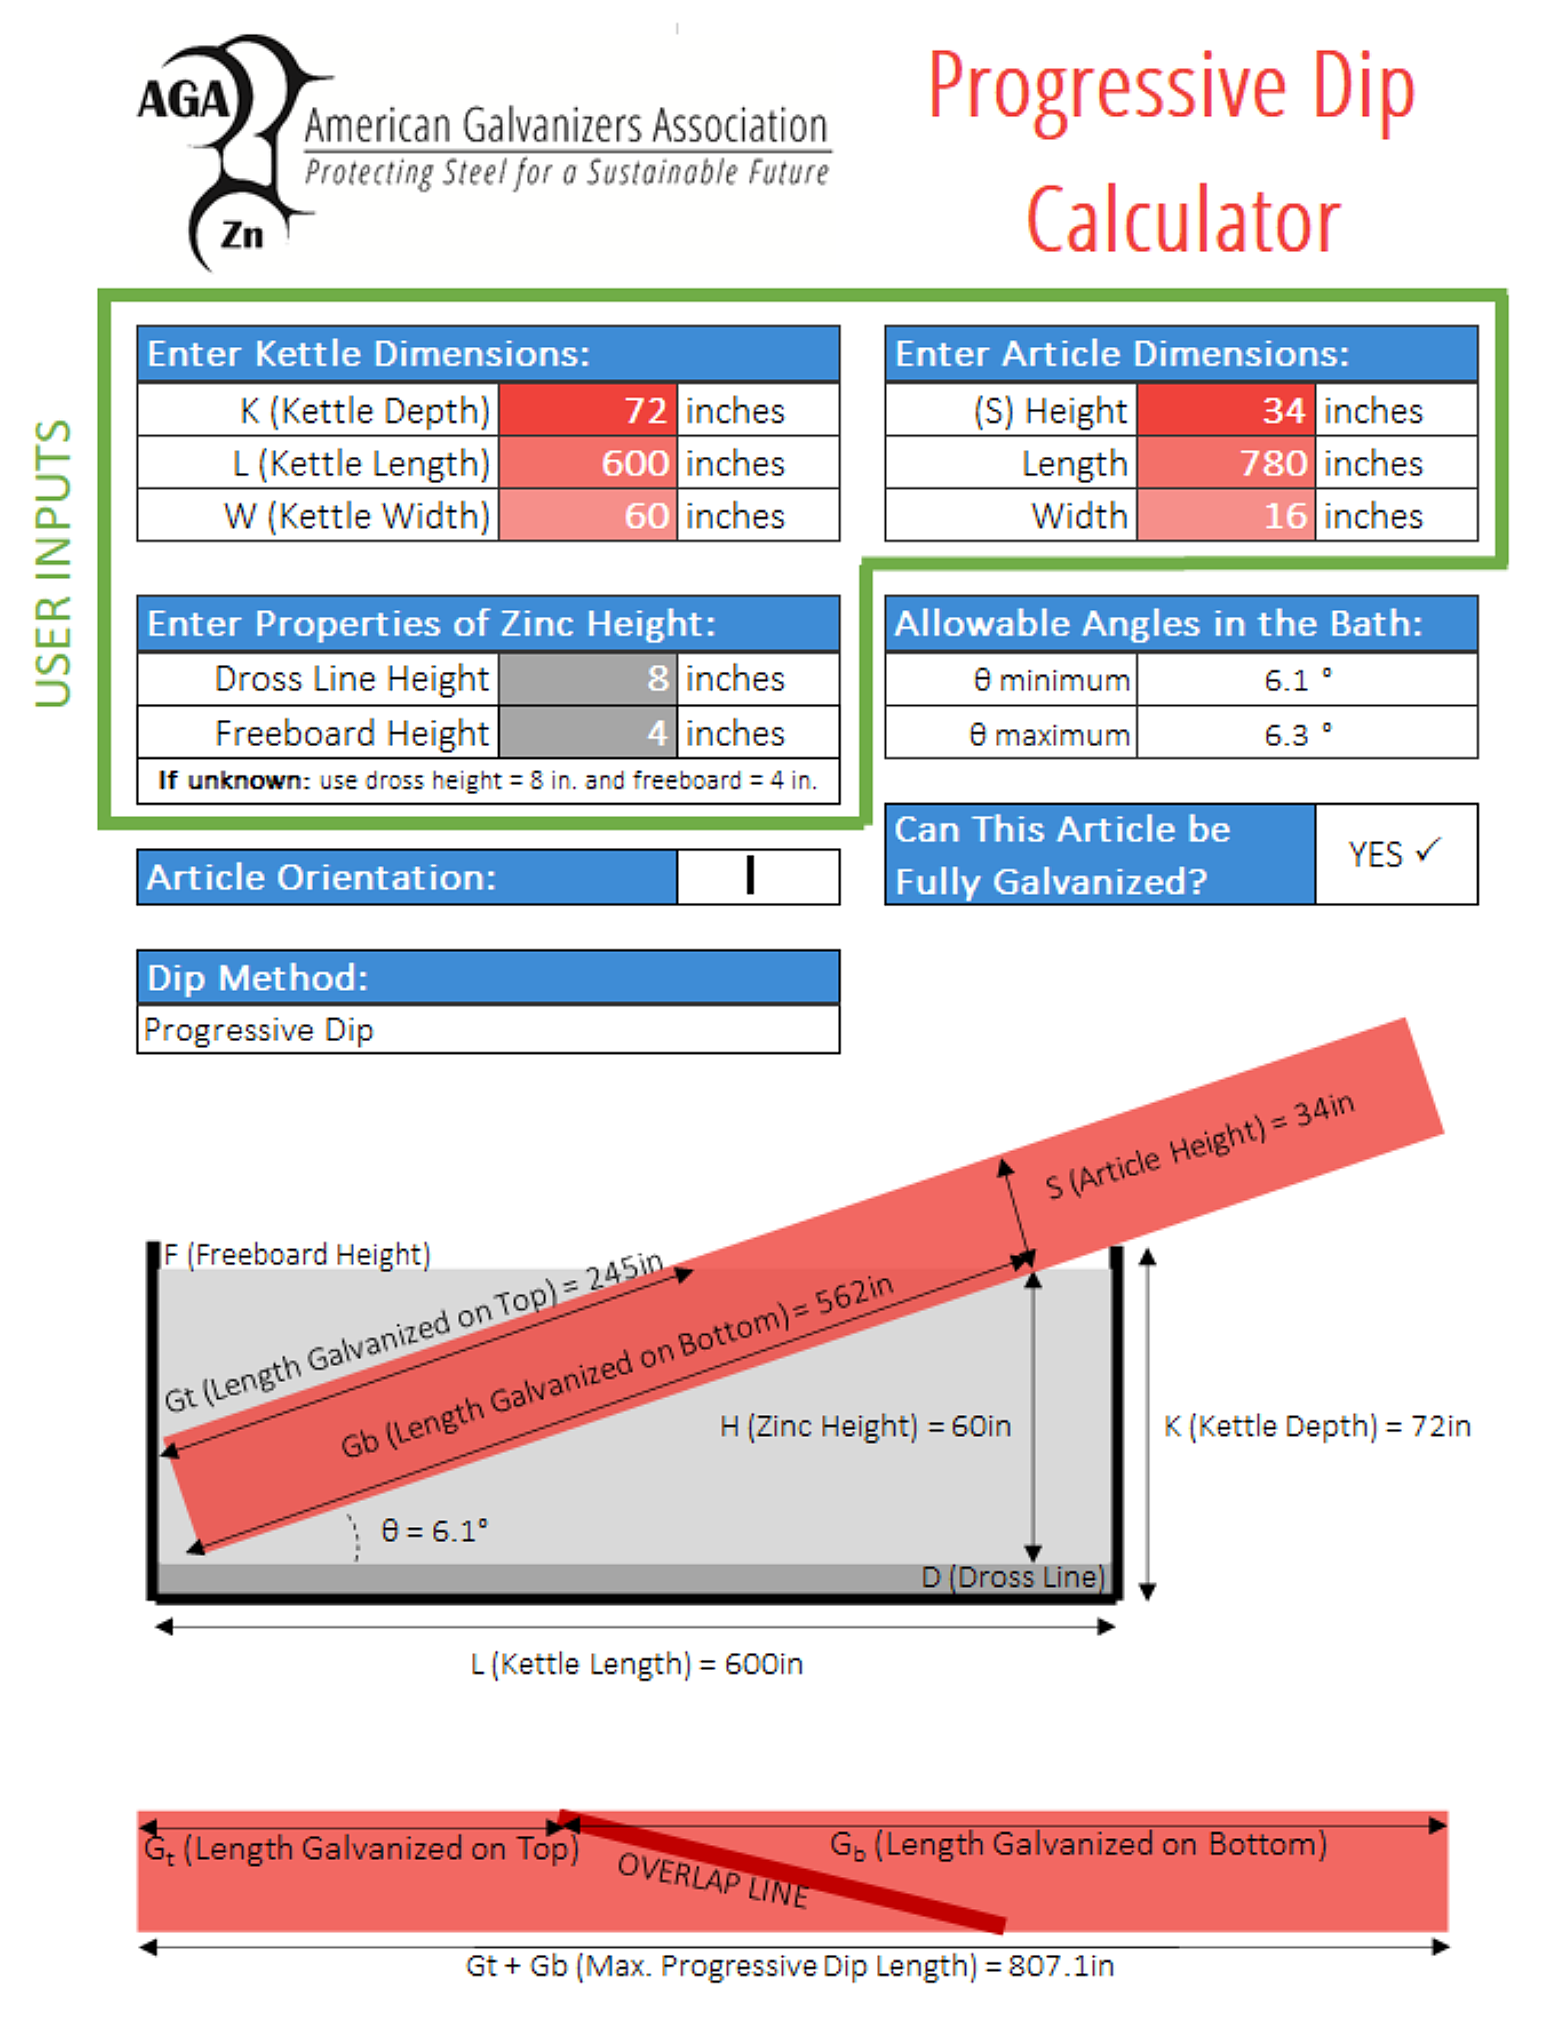
Based on the inputs about the beam and kettle provided, the progressive dip calculator informs us we can successfully progressive dip the beam in the vertical orientation (flanges on top and bottom) assuming we avoid the dross line and maintain a rigging angle between 6.1 and 6.3 degrees. This small range of available rigging options may be impractical, and so rotating the beam’s W and H may provide more favorable options.
If we switch the beam W and H (highlighted in yellow), we see the following changes to the outputs (also in yellow):
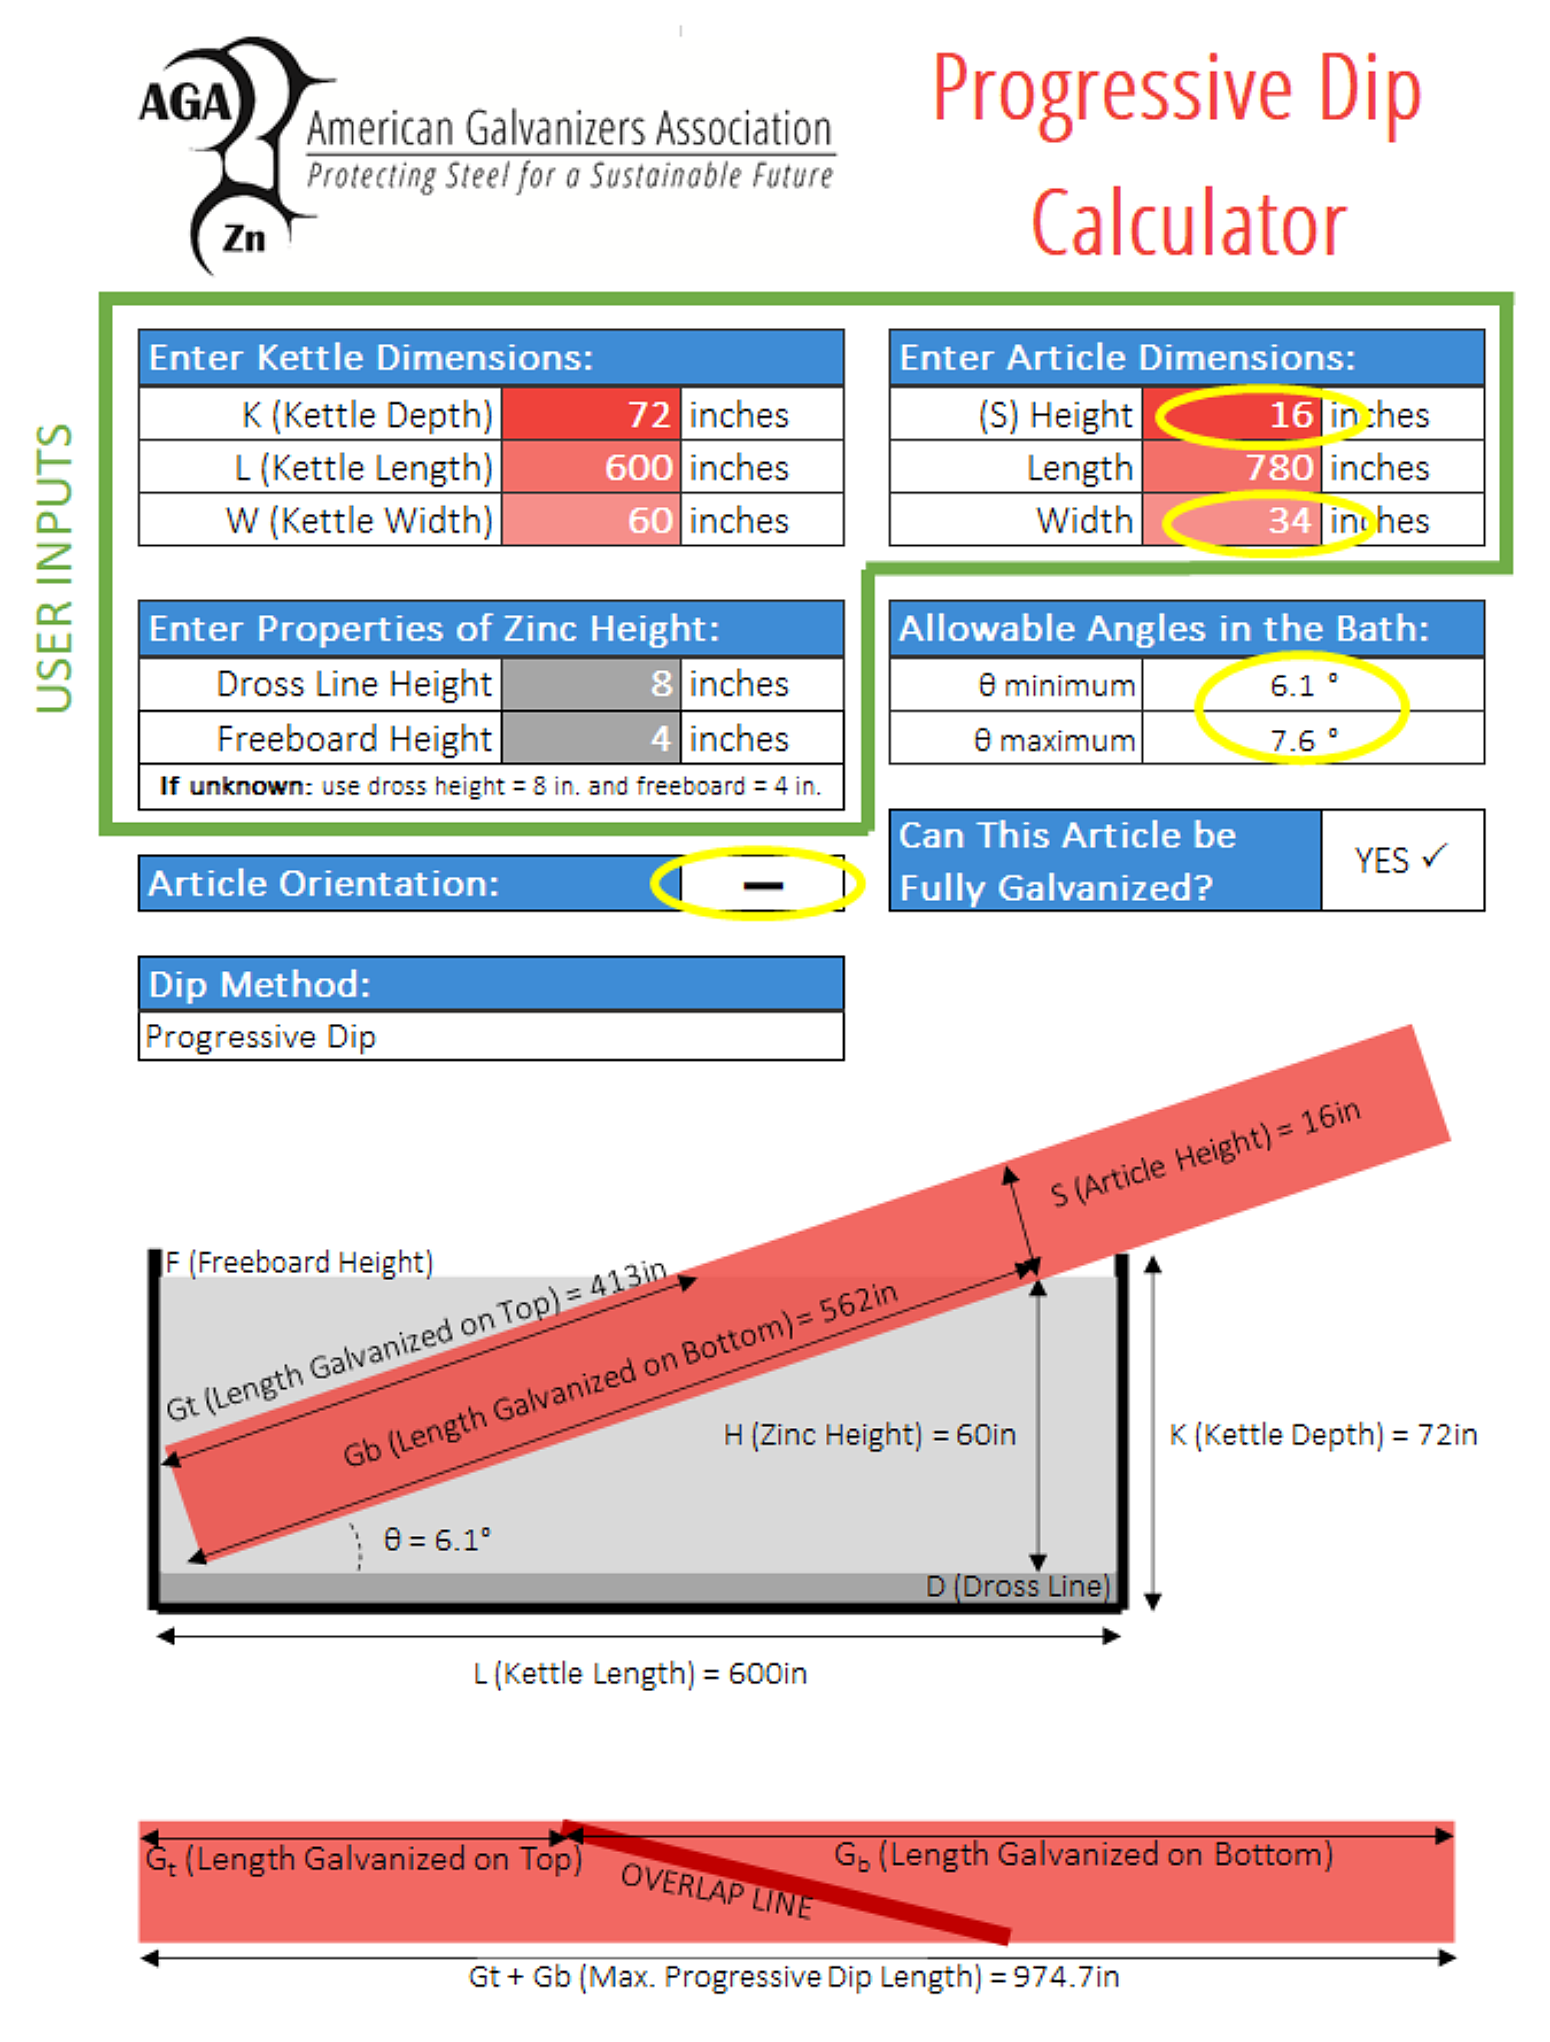
The calculator shows us the beam’s orientation has been changed so that the web is facing up/down, and the range of lift angles has increased, allowing more flexibility in rigging arrangements. If needed, further optimizations may be made by reducing the dross height value (this allows the part to be immersed below the dross line, making more optimized use of the available kettle dimensions).
For additional resources on progressive dipping, check out the AGA Progressive Dip Charts for a simplified tool used to estimate the maximum article length which can be galvanized if the article height and galvanizing kettle dimensions are known.
© 2026 American Galvanizers Association. The material provided herein has been developed to provide accurate and authoritative information about after-fabrication hot-dip galvanized steel. This material provides general information only and is not intended as a substitute for competent professional examination and verification as to suitability and applicability. The information provided herein is not intended as a representation or warranty on the part of the AGA. Anyone making use of this information assumes all liability arising from such use.

