Maximum Allowable Repair Size for HDG (ASTM A123)
What is the maximum allowable repair size for HDG coatings?
It has always been difficult to describe the area on the galvanized parts that can be repaired through ASTM A780, and in the past, this has sometimes led to confusion among inspectors, owners, and galvanizers. To remedy this, ASTM A123 was updated in 2017 to add some clarity to the repair requirements.
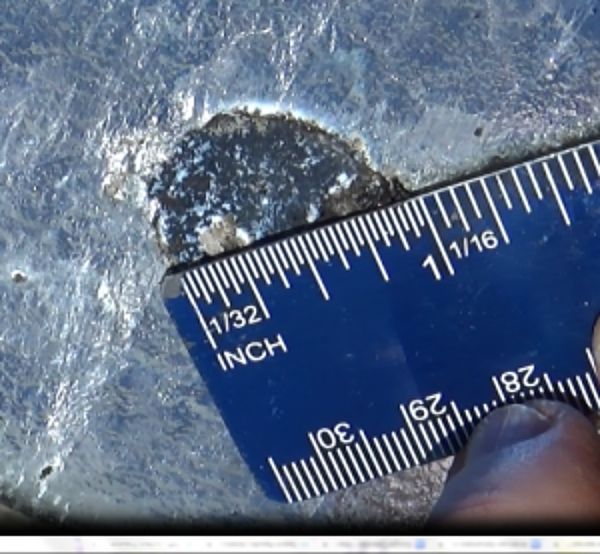
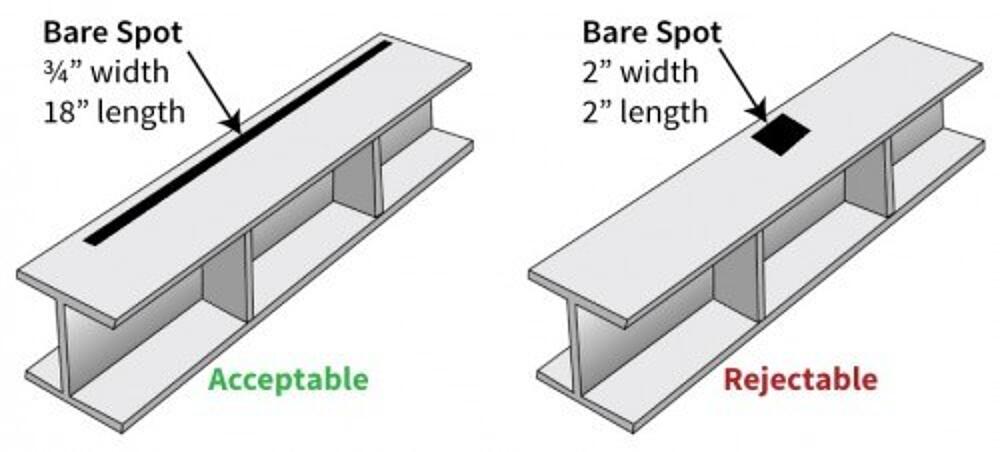
The proposed change includes new language throughout Paragraph 6 to further identify the maximum size of an area that can be repaired, as well as provide a drawing of two areas to be repaired to show in pictorial form the acceptable and rejectable repair areas (Figure 1). At the galvanizing facility, the maximum allowable repair size prior to surface preparation is defined as follows:
6.2.1 Each uncoated area subject to renovation shall be limited in size. The length and width of the uncoated area shall be allowed to exceed 1 in. [25 mm] in only one of the two dimensions. The figure below depicts the allowable size of an uncoated area that can be renovated.
6.2.2 The total of the uncoated areas subject to renovation by one of the methods in A780 on each steel article shall not exceed ½ of 1% of the accessible surface area to be hot-dip galvanized on that steel article. The total of the uncoated areas subject to renovation by one of the methods of A780 shall also not exceed 36 in.2 per short ton [256 cm2 per metric ton] of piece weight. The size of the uncoated area subject to renovation shall only be applicable at the galvanizing facility. […]
The practice for repairing the galvanized coating at the job site is the same as the practice for repair at the galvanizing facility, but there are more restrictions to the allowable repair size while at the galvanizing facility. Previously there was no ASTM standard which explicitly stated there is no maximum allowable size for repairs to galvanized parts in the field which have already been accepted and delivered. To address this issue, ASTM A123 Paragraph 6.2.2 was revised to include the following additional language:
6.2.2 […] Once the parts have left the galvanizing facility there shall be no limit on the size of the area subject to renovation.
Help Determining Maximum Allowable Repair Size at the Galvanizing Plant
To ensure you are meeting the maximum repair size criteria outlined in ASTM A123, it is helpful to obtain or calculate some of the following values about the parts:
- Length (L) and Width (W) of area to be repaired only one of these dimensions can exceed 1 in
- total surface area (SA) of all bare spots
- total surface area (SA) of the part
- maximum repair size using 0.5% surface area of the part: 0.005 * SA
- total weight of the part in tons: pounds ÷ 2000
- maximum repair size using 36 in2/ton of the part: 36 * weight in tons
Knowing the above information will allow you to quickly determine whether a bare area is acceptable for repair at the galvanizing plant under ASTM A780, or must be stripped and regalvanized. If needed, the AGA can provide you with tools to calculate the surface area or weight of typical items such as beams, plates, channels, angles, even tanks. For more complicated calculations, consult the engineering design drawings or directly request these values from the customer.
Lets review two examples that demonstrate the difference between the 0.5% of surface area and 36 in2/ton criteria, as well as how to determine the maximum allowable repair size at the plant using the above calculations.
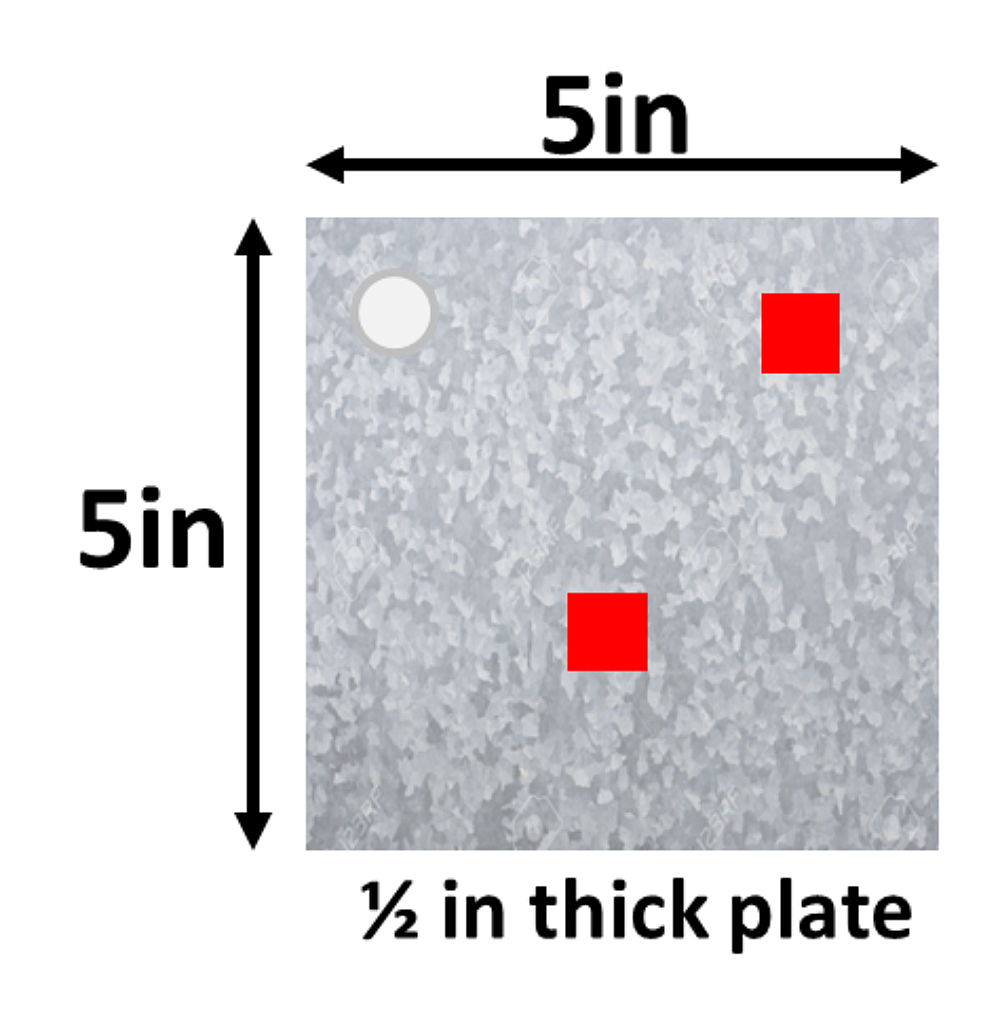
In this example, we have a hot-dip galvanized plate that has two bare spots sized 0.5 in x 0.5 in. To determine if these bare spots can be repaired at the galvanizing facility, we must obtain the following information:
- Length (L) and Width (W) of each area to be repaired only one of these dimensions can exceed 1 in Bare Spot: L = 0.5 in & W = 0.5 in
- total surface area (SA) of all bare spots: = (0.5 in * 0.5 in) + (0.5 in * 0.5 in) = 0.5 in2
- total surface area (SA) of the part: = 2*5 in*5 in + 2*5 in*0.5 in + 2*5 in*0.5 in = 60 in2
- maximum repair size using 0.5% surface area of the part: = 0.005 * 60 in2 = 0.3 in2
Even though the dimensions of the bare spots do not exceed 1 inch in either length or width, these bare spots are not allowed to be repaired per ASTM A780. The part is rejectable because the total bare area on the plate before surface preparation (0.5 in2) exceeds 0.5% of the total surface area of the plate (0.3 in2). This plate will need to be stripped and regalvanized according to ASTM A123.
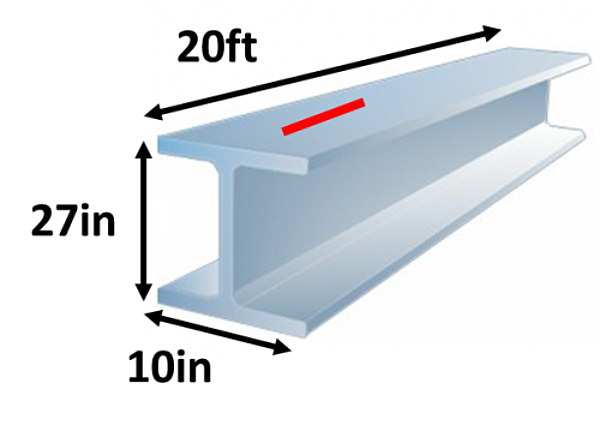
In this example, we have a hot-dip galvanized beam weighing 2,000 lbs that has a bare spot sized 1 in x 40 in. To determine if the bare spots can be repaired at the galvanizing facility, we must obtain the following information:
- Length (L) and Width (W) of each area to be repaired only one of these dimensions can exceed 1 in Bare Spot: L = 40 in & W = 1 in
- total surface area (SA) of all bare spots: = 40 in * 1 in = 40 in2
- total surface area (SA) of the part: = 10,000 in2 (per engineering drawing)
- maximum repair size using 0.5% surface area of the part: = 0.005 * 10,0000 in2 = 50 in2
- total weight of the part in tons: = 2000 pounds ÷ 2000 = 1 ton
- maximum repair size using 36 in2/ton of the part (parts ? 1 ton): = 36 * 1 ton = 36 in2
This bare spot is not allowed to be repaired per ASTM A780 even though the dimensions of the bare spot exceed 1 inch in only one of the dimensions (length) and the total bare area (40 in2) is less than 0.5% of the beams surface area (50 in2). The part is rejectable because the total bare area on the plate before surface preparation (40 in2) exceeds the calculated value for 36 in2/ton of the part (36 in2). This beam will need to be stripped and regalvanized according to ASTM A123.
© 2026 American Galvanizers Association. The material provided herein has been developed to provide accurate and authoritative information about after-fabrication hot-dip galvanized steel. This material provides general information only and is not intended as a substitute for competent professional examination and verification as to suitability and applicability. The information provided herein is not intended as a representation or warranty on the part of the AGA. Anyone making use of this information assumes all liability arising from such use.
