Sampling Protocols to Ensure Proper Zinc Coating Thickness
Are there sampling protocols to help ensure that a group of parts has obtained the proper zinc coating thickness?
Yes, a sampling protocol has been developed by ASTM International since a coating thickness measurement for each piece of galvanized material in a project would not be practical. ASTM A123/ A123M states, for products whose surface area is equal to or less than 160 in2 (1032 cm2), the entire surface of the tested product constitutes a specimen. In the case of products containing multiple material categories or steel thickness ranges, that product will contain more than one test specimen. In addition, products with surface areas greater than 160 in2 (1032 cm2) are considered multi-specimen products.
| # of Pieces in Lot | # of Specimens |
|---|---|
| 3 or Less | ALL |
| 4 to 500 | 3 |
| 501 to 1200 | 5 |
| 1201 to 3200 | 8 |
| 3201 to 10,000 | 13 |
| 10,001 + | 20 |
Sampling Terms
- Lot - Unit of production or shipment from which a sample is taken for testing
- Sample - A collection of individual units of product from a single lot
- Specimen - The surface of an individual test product or a portion of a test product which is a member of a lot or a member of a sample representing that lot
- Test Product - An individual unit of product that is a member of the sample

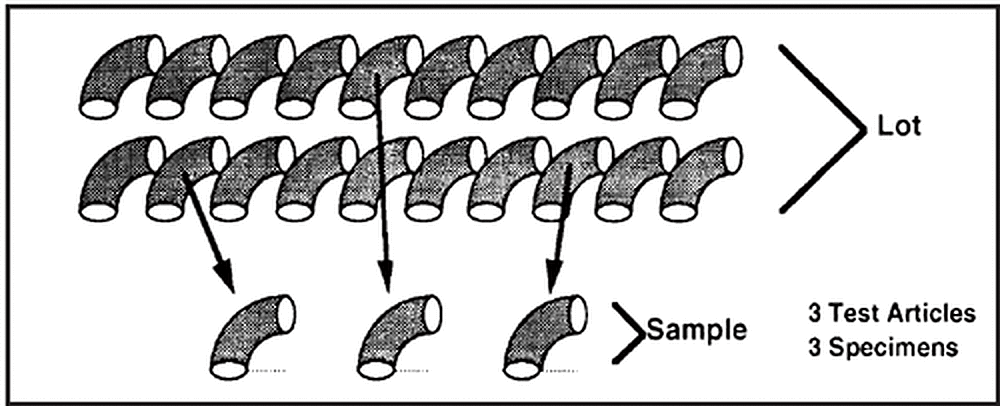
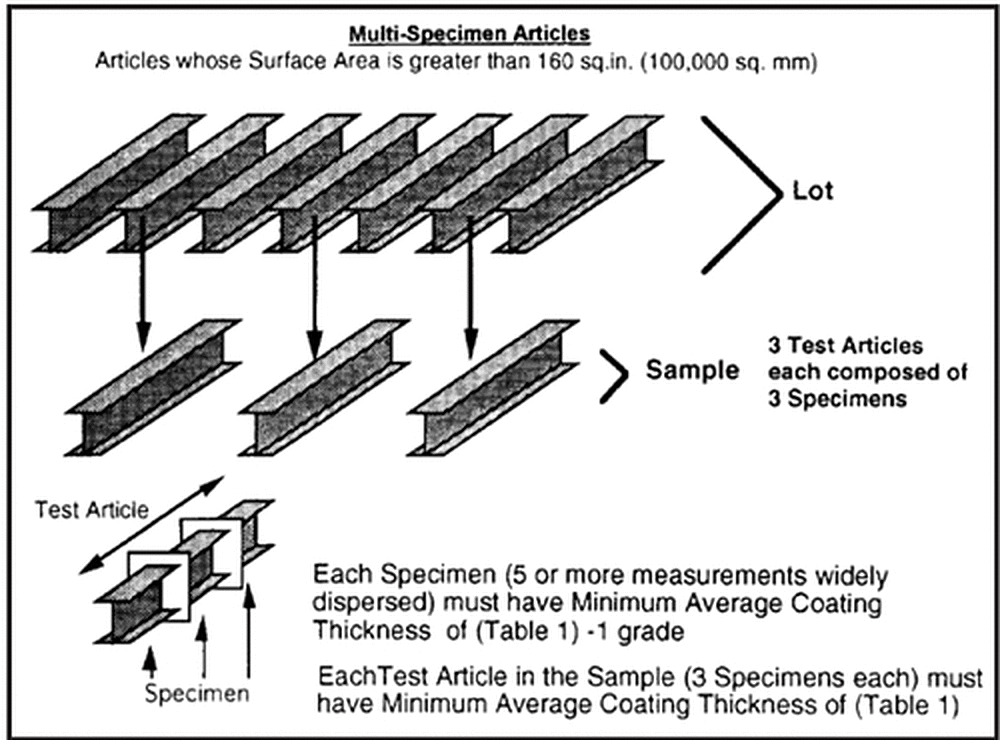
For single specimen products, each specimen is randomly selected. For thickness measurement tests, a minimum of five widely dispersed measurements are taken over the surface area of the specimen in order to represent the average specimen coating thickness. The average value of the five coating thickness measurements must be greater than or equal to one grade below the minimum average coating thickness for the material category. In Figure 1, the separation of a lot into a sample and an individual specimen is shown. A multi-specimen product is defined as having a surface area larger than 160 in2 (1032 cm2), or has multiple steel thicknesses, or contains more than one coating category. In order to test coating thickness of products whose surface area is greater than 160 in2 (1032 cm2), they are subdivided into three continuous local sections with equivalent surface areas, each of which constitutes a unique specimen. In the case of any such local section containing more than one material category or steel thickness range, that section will contain more than one specimen.
In Figure 2, the separation of a lot into a sample and an individual specimen is shown. For products that are hot-dip galvanized following either ASTM A123 / A123M or A153 / A153M, Table 1 is used to determine the minimum number of specimens for sampling from any given lot size. For rebar that is hot-dip galvanized according to ASTM A767, The information below is used to determine the minimum number of samples per lot, measurements per sample, and the total number of measurements required for each of the different coating thickness measurement techniques.

- Magnetic Thickness
- 3 Samples per lot
- 5 or more measurements per sample
- 15 measurements, at minimum, comprise the average
- Microscopy Method
- 5 samples per lot
- 4 measurements per sample
- 20 measurements, at minimum, comprise the average
- Stripping and Weighing
- 3 samples per lot
The minimum average coating thickness for a lot is the average of the specimen values and must meet the minimum for the material category. The minimum for an individual specimen is one grade below the minimum for the material category. An individual measurement on a part has no minimum thickness requirements but bare areas are not allowed. All parts that do not meet these requirements must be resorted and reinspected or rejected and re-galvanized.
Related article - Multi-Specimen Test Articles & Coating Thickness Inspection
© 2026 American Galvanizers Association. The material provided herein has been developed to provide accurate and authoritative information about after-fabrication hot-dip galvanized steel. This material provides general information only and is not intended as a substitute for competent professional examination and verification as to suitability and applicability. The information provided herein is not intended as a representation or warranty on the part of the AGA. Anyone making use of this information assumes all liability arising from such use.

